Crafting the Missing Pieces from Scratch

The disassembly phase of a restoration is like sorting the pieces of a puzzle. Except sometimes during a restoration you might not have all the pieces. With our recent restoration of the Maserati A6GCS, we noticed that the car was missing the brake drum dust shields for the front wheel hubs based on our previous Maserati A6GCS restoration.
Research for Best Results
Our research team went to work to find in period photos of the current Maserati we are restoring. After confirming that this car in fact had them, we began to think of ways to solve this problem. Because this part is no longer manufactured, we had two choices. We could either outsource the project, or try to make the brake drum dust shields ourselves. Keep reading to find out how our team used a bit of engineering, machining and pure craftsmanship to make these brake drum dust shields from scratch.
Brainstorming for Solutions
Once it was confirmed we needed the brake drum dust shields, our project manager, Adam Smith, started brainstorming. After discussing with the assembly, trim, and machining departments, Smith made the decision to make the parts here at Motion Products Inc. instead of outsourcing them. This route saved us time and production costs to do the project ourselves which resulted in saving our client the costs of outsourcing as well. Smith and the departments all worked together to come up with a game plan. To make this project as seamless as possible, the team drafted out what they needed from each other and a timeline to keep the project on track.
Machining & Engineering to Create a Foundation
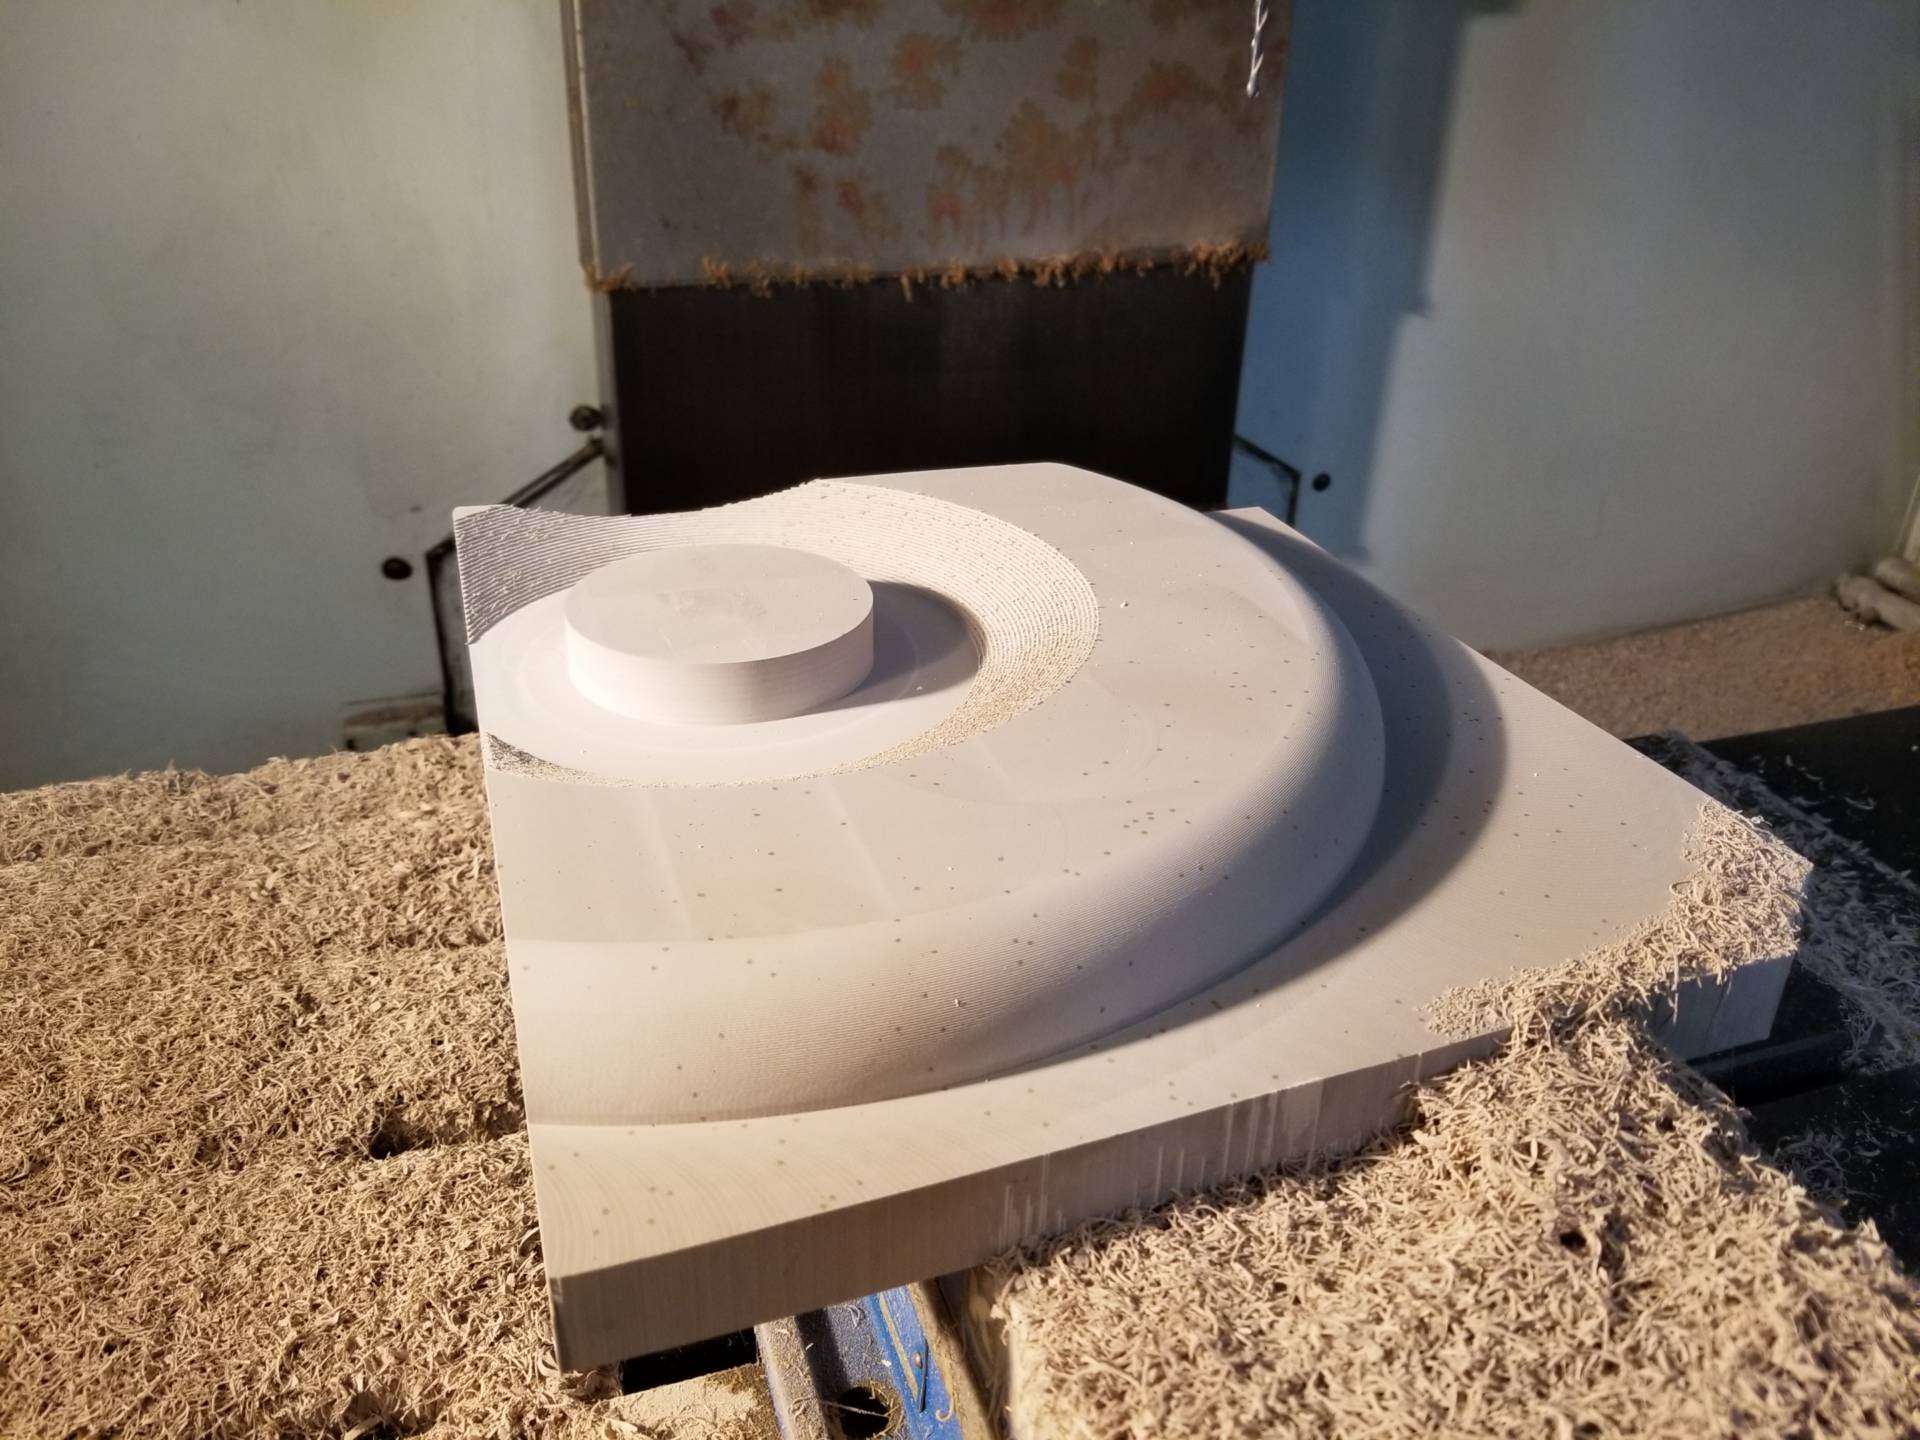
Our machine engineers, Tom Wheeler and Ryan Wallner, started the process by taking measurements of the wheel hub area and using in period photos to scale the perfect size and shape the brake drum dust shields needed to fit over. Using CAD/CAM software they drew a digitized model of the brake drum dust shield so they could produce a partial buck made out of ren board. The ren board material is soft enough to create the perfect shape of the brake drum dust shields down to the exact measurements, and strong enough to withstand the pounding between metal working tools and aluminum.

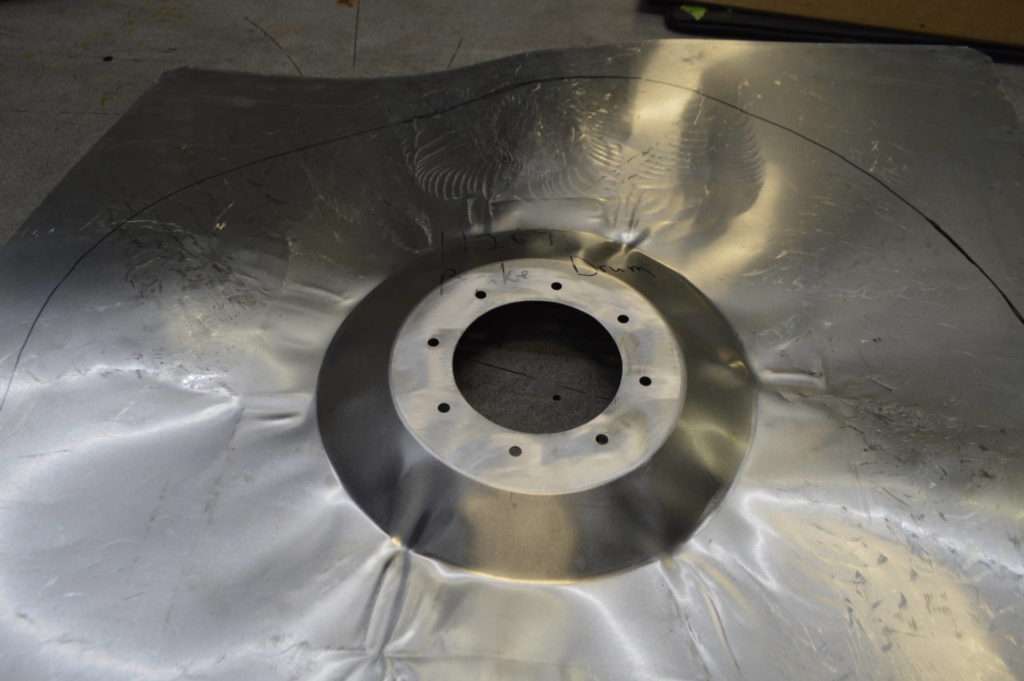
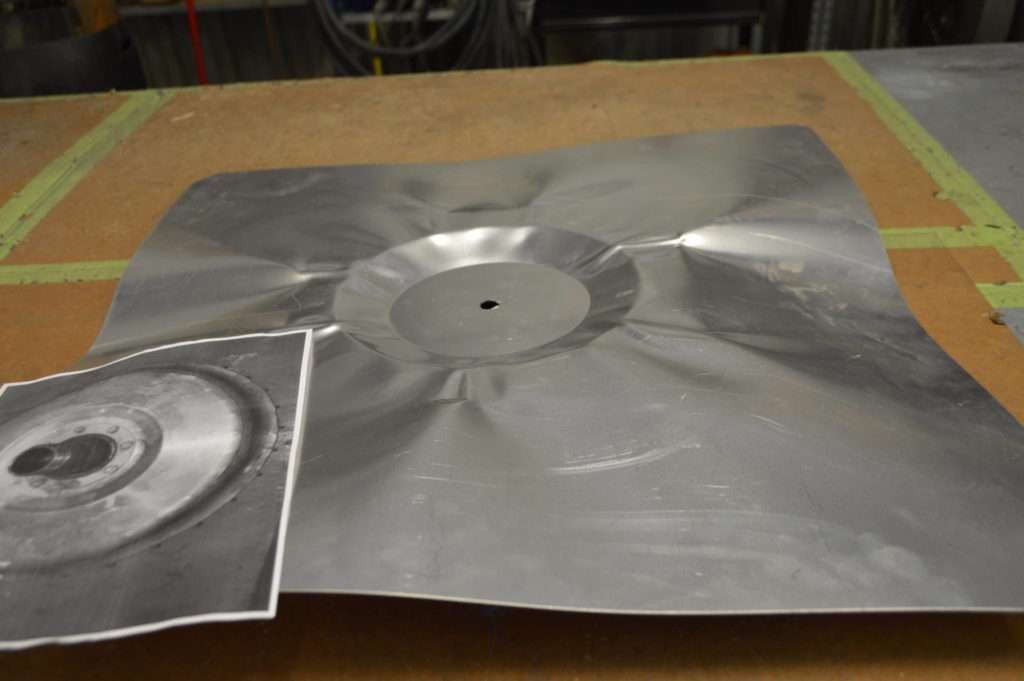
With the partial buck the engineering team pressed a flat aluminum sheet into the initial shape of the brake drum dust shield as shown below. They also cut out thread holes allowing our trim specialist to bolt down the aluminum pieces to the buck keeping the metal from shifting around while he worked. This gave our trim specialist, Dave Jensen, a good start to forming the perfect missing pieces.


Crafting the Missing Pieces
For this project, Dave Jensen started by cutting as much access metal off as he could, making it easier to form the metal to the shape of the buck. Annealing, a heat treatment process that softens the metal, helped Jensen form the metal around the buck. To remove the initial wrinkles from the pressed aluminum, Jensen used shrinking dies in the craft former to smooth the metal. This technique gathered the material and smoothed the metal out leaving Jensen with a bowl shape. This process was repeated many times to get the metal to form at the correct angle.
The process included a lot of back and forth metal working, between using the pullmax machine and hammering with slapping spoons to get the brake drum dust shields to fit tightly around the buck. Jensen then used the planishing hammer to obtain the reverse curve of the brake drum dust shield, forming the perfect missing piece.
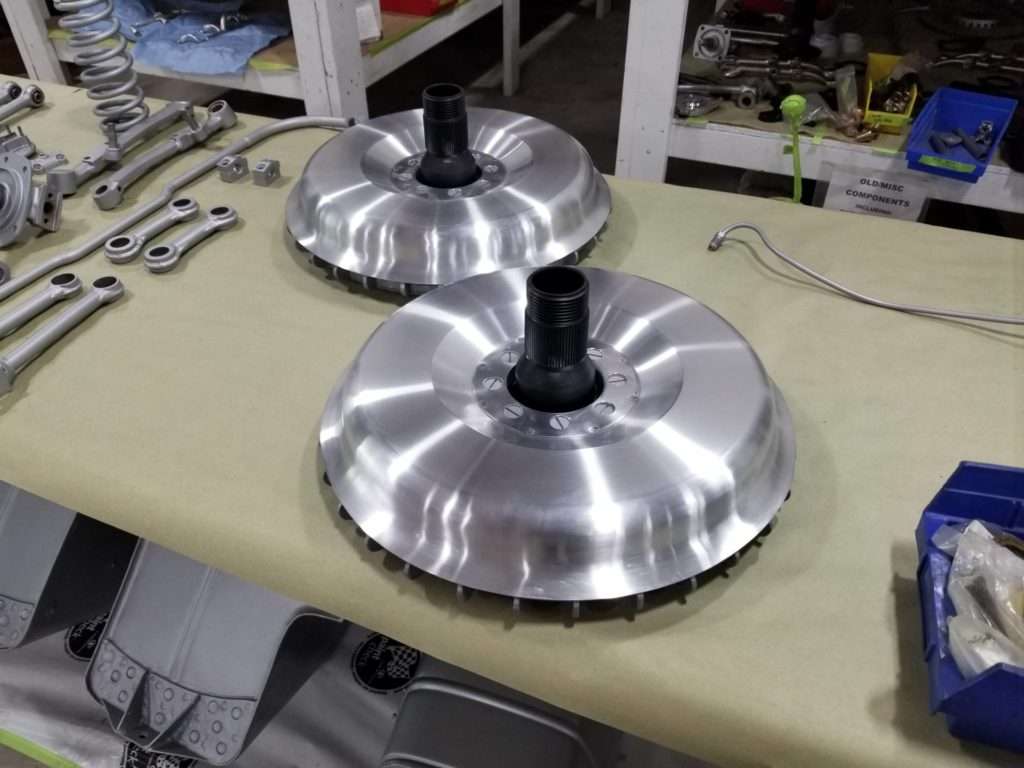
Finally, after getting the shape that was needed to cover the brake drums, Jensen put a metal finish on the brake drum dust shield to give the piece a uniform surface. He sanded and scuffed the pieces using a lathe and sandpaper to give the brake drum dust shields a spun finish. When Jensen completed the brake drum dust shields, the assembly team checked the fitment of the parts and assembled them onto the wheel hubs.
“We weren’t sure if our plan was going to work at first, but this project was challenging, fun and very rewarding. It came out just the way I wanted it”, said Jensen.
Our capabilities allow us to provide some of the best quality parts for our clients and their restoration projects. Everyone involved learned something new and our team discovered a new method of recreating a part that is no longer manufactured. This is just one example of how our team worked together to solve a restoration problem.
Is your classic car in need of a restoration? Our team of experts would be happy to help. Contact Us today!
Leave a Reply